
|
|
|
1) Something
Old |
|
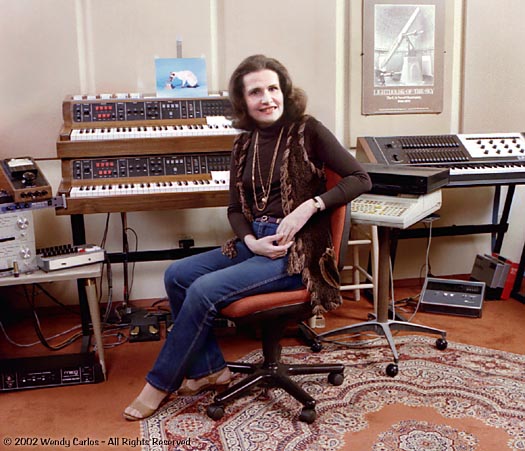
We
all need regular changes in our lives to keep from going
"stale," set in our ways, don't you think? In that spirit
here's a "something new" that recently took over a corner of
working space here. It also is an embodiment of "something
old." In addition to that, there's something borrowed (from
friends), and something blue (several control panels and
some HD feet), within the assembly. Please come along with
me on a "cook's tour," to see up close what's taken up so
much time and energy. You can judge for yourself if it seems
worth it. The project has another side -- it's a
constructive way to retain some sanity in an increasingly
insane and dangerous country and world, no hype there -- a
two-sided distraction: both recreational and practical,
serious. I hope you find it a bit of a surprise here, those
of you who have not had to put up with me directly and
discover how crazy I can be... Goodness, I just noticed
that the stuff on the wall, the paper mache bird my dad
made, have not moved much in a decade! In such an evolving
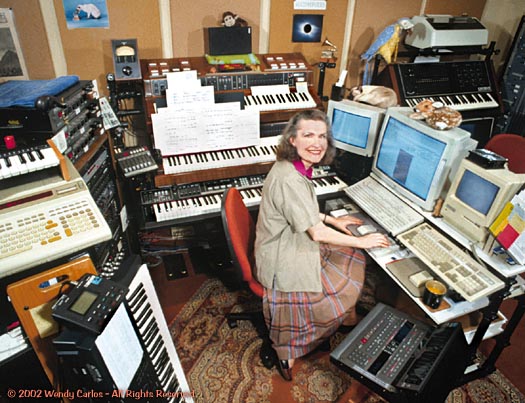
field as electroacoustic music it's probably unusual to
maintain most of the same configuration for 10+ years. Of
course I'm much more interested in making music than playing
with technology. Once a fast, convenient setup was achieved
it seemed too good to mess with in some trendy "chasing
one's own tail." I've come to depend upon the familiarity of
everything, but then for most earlier composers stability of
a working environment isn't worth much discussion.
Traditionally a composer works at a decent piano or the
equivalent, a handy drawing board to one side, with some
manuscript paper and a pencil with a good eraser -- what's
to become outdated there? Perhaps some audio and video
equipment is placed nearby, especially to work with another
medium, like scoring a film. |
|
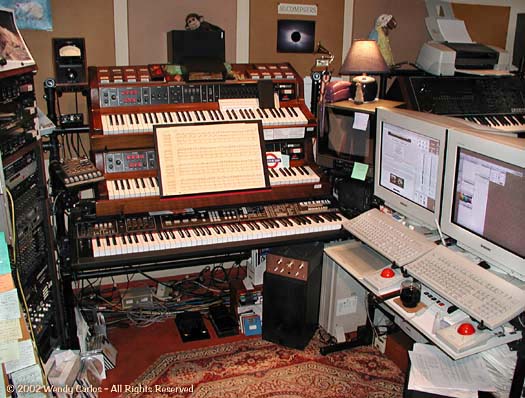
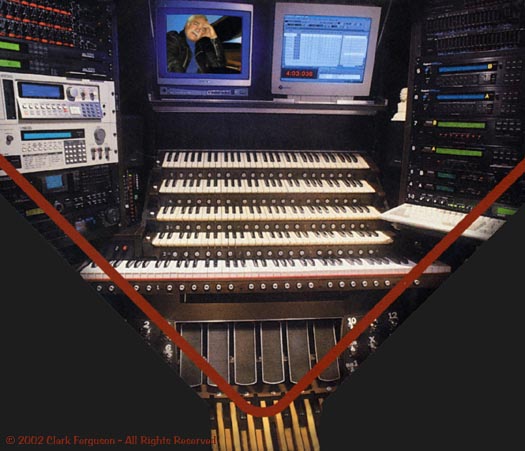
= A Custom MIDI Pedalboard = If you checked out the other end of my studio before 2002, you'd have seen this niche, directly in front of the seldom used Moog Synthesizer. This is where I spent hours with two Kurzweil synths, the K2000S and K2000R, on most of my recent sound design work. Chris Martirano was my Kurzweil contact and musician friend who helped me get the 2000s up and operating, customized, and solve some initial bugs (as he did again for the K2600's described below). This is the arrangement used on "Tales of Heaven and Hell," and the filmscore for "Woundings." The small Yamaha keyboard at top left can play the rack-mounted K2000R, but most of the time I preferred the convenience of the regular K2000S, to the right. Long MIDI cords tied both instruments over to the rack sitting to the left of the 88-note Midiboard you can see up above, where two MidiTimePiece interface boxes are mounted. These are MotU units, and allow Digital Performer to operate the Kurzweil synths from across the room. There's also a vintage Yamaha SY77 nearby, and a newer Korg Z-1, too. They're dandy for certain kinds of timbre creation. In the summer of 2001 I
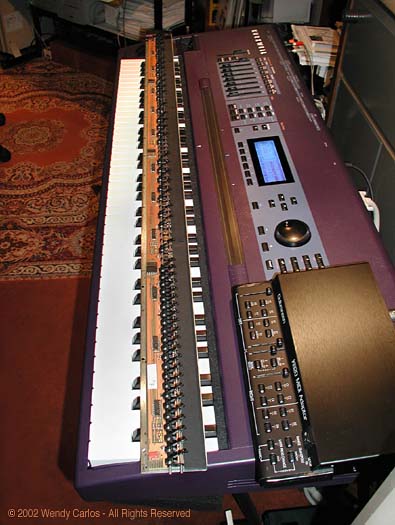
added a K2600S to the studio -- first new synth in some
years. The first month I couldn't get enough of the
convincing "triple strike" piano sound, and began practicing
long hours again, as I used to. It was great to get back at
making music, the skills of moving fingers precisely and
expressively. The chore of remastering all my older albums
had dragged me away from that. I'm not a great performer, as
I've often said, but I do sight read well, and enjoy
improvising new things as well as hacking away at the
classical repertoire. When I ordered the K2600 online, I
noticed a small set of Kurzweil disks which contained pipe
organ sounds and samples, both classical and theater ranks.
That sounded interesting. I'd taken several months of organ
lessons during high school, but as we couldn't afford an
organ, these were largely wasted. But my fascination with
pipe organs was a major influence on the path that led me to
the synthesizer. Looks like great fun!
Something old and new were gracefully combined, same path I
was heading down with a powerful new musical tool, a great
feeling keyboard, about to try out some pipe organ sounds.
After loading these into the 2600, as usual it took some
time to organize and customize the new programs with all the
expressive "hooks" I'm used to. I couldn't help but smile to
be exploring a medium which I'd ignored pretty well since
graduate school. The VAST engine of the K2000 / 2500 / 2600,
along with decent samples of real pipe ranks, is a pretty
heady mix. Everything you need to create a really impressive
replica of "The King of Instruments" is right there. |
|
Jack
suggested I might consider this kit, even though the company
did not formally "support" organ pedal installations. Other
customers already were using it that way, though, and all
reported good to excellent results. I decided to give it a
try, since my old and not often used Yamaha Electone E-5
organ has a very study and attractive 25-note pedalboard. If
I could retrofit the new pickup boards beneath this, I might
be in business, and it would cost a lot less than a new
similar sized board, even forgetting for a moment about
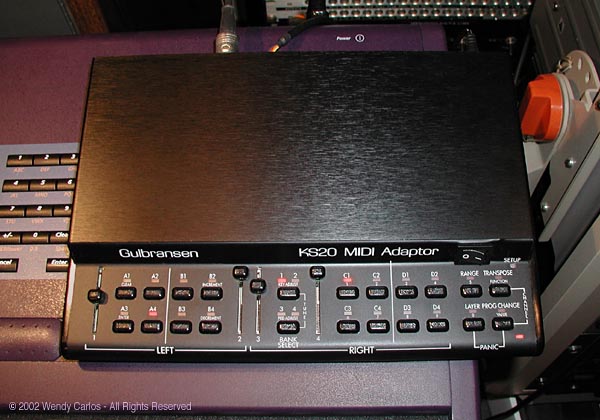
velocity and pressure sensing (btw-
both poly and channel pressure are supported by Gulbransen
-- hey!). Yes, it would
be a compromise, the E-5 doesn't use a full AGO 32-note set
of pedals, but the smaller flat but radiating 25-note
version made popular on Hammond and other electronic organs.
Since I'm no organist, and seldom would need the extra top
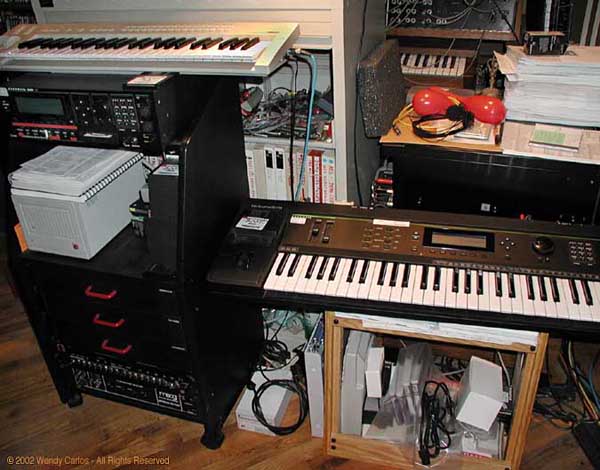
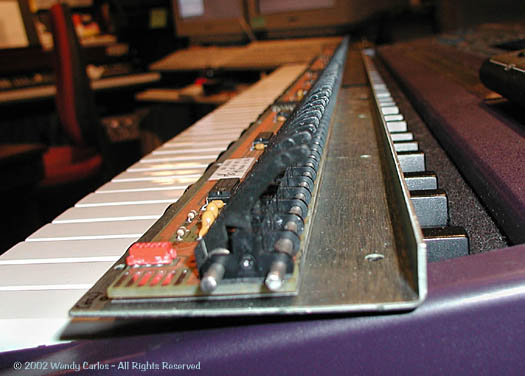
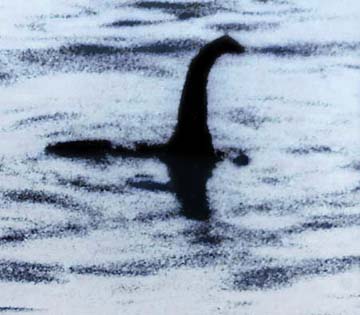
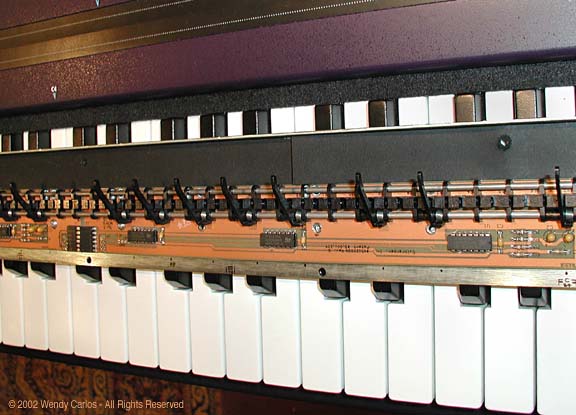
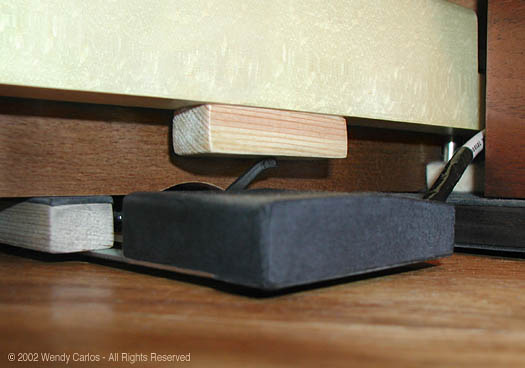
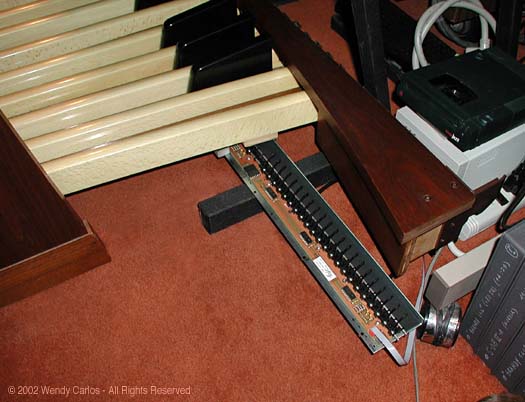
seven notes, this seemed a reasonable place to start. The kit included sundry connecting cables, mounting hardware, complete instructions, plus the brains of the pickup system, the KS20 control box shown next (also resting on top of the new 2600), below left. It's a well-engineered device, I've grown very fond of it since using it. If you look closely at one end you'll get a good idea of the elegant way the sensor strip is arranged, below center. Those precision optical moving vanes resemble the famous Loch Ness monster prankster photo from 1934. (Robert Wilson, the prankish London physician and coperpetrator with Wetherell, later confessed in great detail, like the similar "crop circle" partners in crimininy sakes, Bower and Chorley. But by then many had grown too fond of the hoax to admit they'd been cleverly duped. Think also of Conan Doyle, far too proud and gullible to admit he'd fallen for two schoolgirls' cutout "fairies".) The manufacturer impishly calls them "Nessies." Unlike the modeling clay (plasticine) long neck and head on a toy submarine of that well circulated image (below right), the Gulbransen "Nessies" are not a "fake in the lake." So reports of seeing and touching them on a sensor strip count as verified "Encounters of the Tangible Kind" (wink nudge say no more)... Before they could be put to work, there was the creative task of mounting the sensors properly beneath the 1974 vintage E-5 pedalboard. I began by refinishing and polishing up the old board, some signs of wear, a few scratches. That came out nicely, it looks brand new. Since it's flat, not concave, the strip would not have to be broken up as it would be for installation beneath an AGO pedal set. There still was some carpentry needed, in several frustrating false-starts, before the whole thing came together. I took my time, a whole month, as there was no rush. You can see the redone underside below left, before the sensors were mounted. The narrow wood strip was added to support one edge of the steel mounting plate. Note the 25 small wood blocks, one beneath each key, which we'll look at next. Several hours learning to use a wood rasp brought about the needed clearance cutaways in the four long supports that run in the B-C and E-F gaps of two octaves. I learned "the hard way" that all unused sensors ought have their "Nessies" carefully removed, and saved in a zip bag for future use. When only the active sensors remain, it gives the the strip the gapped look of a "grin with many missing teeth," shown below right: The strip was mounted and removed many times, while working out the best position in each dimension. On the bottom of the pedal keys I had to cut and mount short wood blocks to reach downwards half an inch, to the top of the sensors. The other option, routing a deep gouge into those four support strips, would have weakened the structure greatly. The small blocks are glued in place along a straight line, and sanded very smooth. The "Nessies" ought be slightly depressed when a key is fully up, and not quite fully depressed at the bottom limit. It's fortunate that organ pedalboards use approximately the same key depression depth as on a keyboard, so this is no problem. You can see a sensor in its final position in the next photo, which also shows one of the small curved cutaways mentioned above, and a simple homemade black "end cap" for the sensor strip. For cosmetic reasons I slipped in a long black fiberboard strip (visible here) to hide the "glint" of the steel base plate when you look straight down between pedals. Since the pedalboard is not as wide as an 88-note keyboard, the rightmost 22-note board was not needed, and all its sensors were left in place. At first it simply jutted out on the side, as seen in this preliminary test, below right. (Compare the previous shot, the same end -- after the strip had been cut.) It was awkward and
dangerous to leave it there, so I hacksawed the base plate
at the seam for the top circuit board. Jack kindly provided
me with some extra connectors, so I could improvise a short
extension cable, and mount that top board separate from the
rest of the strip, while still connected electrically. It
will provide several useful WurliTzer-style trigger pedal
keys someday, since these sensors are still active, if now
unused.
|
|
|
Wendy Carlos, Wurly II -
1
![]()