
|
|
|
1) Something
Old |
|
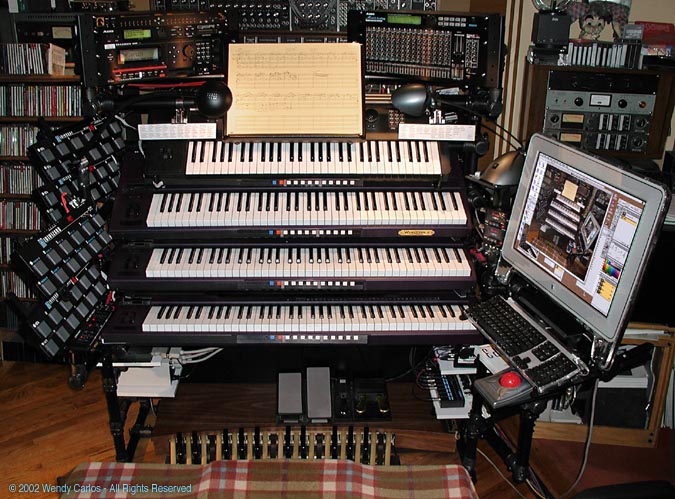
Okay, we've been looking at all the trees, but not yet the forest. Before examining several important custom components, let's pause and see what we've got. Behold, the final "WurliTzer II" hybrid instrument! Yikes! There's a lot there
-- wot hath got rot? Having built this absurd elaborate
thing, I'm going to have to learn how to play it
(I
sure sounded pretty stinky at first --
phew/p-u!). What's the
old slogan, "never wish too much for something; you might
get it!"? Just so. But there are some conveniences you
watched going together above that should assist in the many
uses the new setup will be put to. First and most important,
the keyboards, or now let's call them by their organ
terminology, "manuals," are positioned closely together.
There is just enough space to slide your hand in between
each, to adjust the many K2600 sliders and buttons. You have
to use the "Braille" method, but that's generally all you
need during performance. In fact in this configuration the
whole instrument is just that, a PERFORMING instrument.
Frequently, though, it's necessary to gain full access to
each front panel and display, for sound design and program
editing, for global adjustments and loading or saving files.
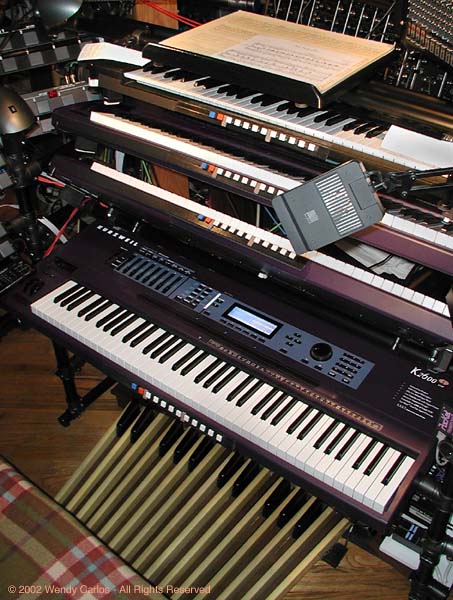
No problem. With a quick lift of the hand the individual
upper tiers all swing smoothly upwards, pivoting about their
centers of mass. The process looks like this, starting with
the music stand only, then continuing down, until the bottom
2600 is wide open. Within several seconds you
can be working away at any of the synths, in sound design
configuration. There's plenty of space to work comfortably,
even for hours at a time, as you can see next. This is the
worst case, the lowest K2600, opened up for easy access.
(Note that every tier, including the music rack, has those
soft, firm foam bumpers on the underside, so there's never
any fuss about if you are in place or not. The music stand
halts exactly horizontally, so no music will slide off. When
you're done, you quickly return to the performance
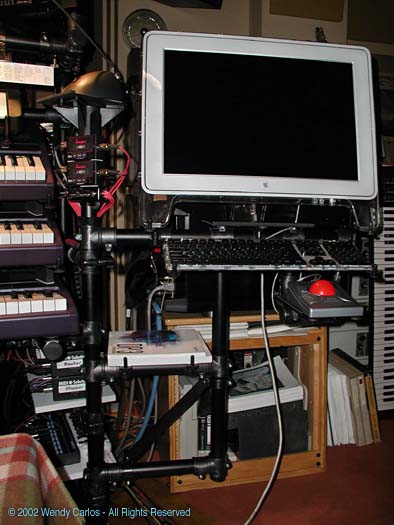
configuration. After all of this was
working correctly the extra Ultimate Support parts arrived,
and I was able to build the swinging shelf for the Mac G4,
which had been prototyped as you saw earlier, to be sure
that in practice it could all be made to work. The design
was again a matter of trial and error, eventually zeroing in
on an elegant triple cantilever design. Once more, after two
more diagonal support braces were added, the whole shelf,
even with the Cinema Display in place, became stable and
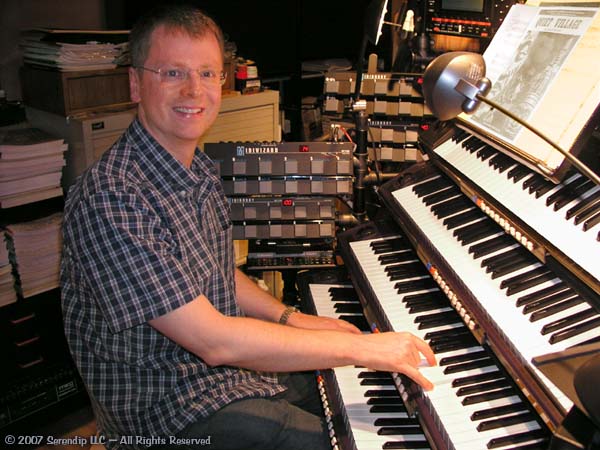
solid. That's a hint of the change of focus brought about by the new instrument, when compared with the original studio setup (the Something Old section). Remember those computers are right beside the keyboards all of the time, in a one-line-at-a-time workspace. It was very rare that I'd even consider sitting down just to play or practice in that environment. Well, now I'm doing it all the time. I leave the G4's shelf all the way to the right, turn on only the sound making instruments, sit down and... (what's a keyboardists word for "wail away"?) dig in. In other words, this LOOKS and ACTS like a self-standing musical instrument, and my reaction is to treat it that way. I find myself playing all sorts of music on it: classical - popular - jazz, writing out new compositions when inspiration often strikes (using just a pencil and manuscript paper -- wotta concept!), and improvising freely for hours at a time. The multi-manuals and pedalboard encourage a more spontaneous way of working. For recording I'll undoubtedly return frequently to the care and polish of solo lines one at a time. But guide tracks and many final tracks, will come from this more intuitive way of making music. Stay tuned for how it all turns out! Since some of you have
asked to see a shot of me at work on the Wurly II
(we've
also just added a photo of Clark
Ferguson
seated at his 5 manual instrument),
let's include this photo with me practicing
(slowly
I'm getting less stinky).
Thanx to writer Carol Wright, who was visiting NYC and had
stopped by for a rare f2f and took this good shot. My fault
that the new digital camera was set rather dark for dim
lighting, so the original image is slightly grainy and
underexposed (improved
in PhotoShop here). But
it has a nice moodiness about it, and provides a sense of
scale for the completed rig. |
|
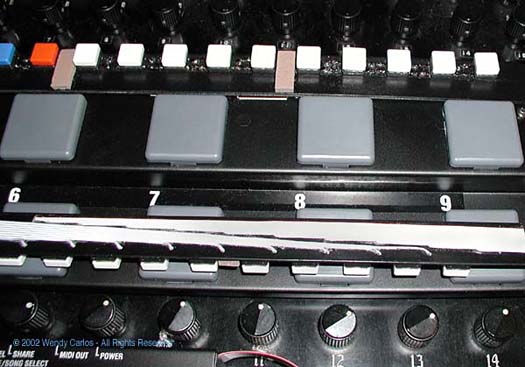
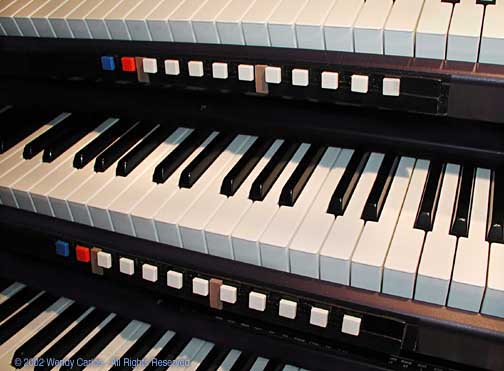
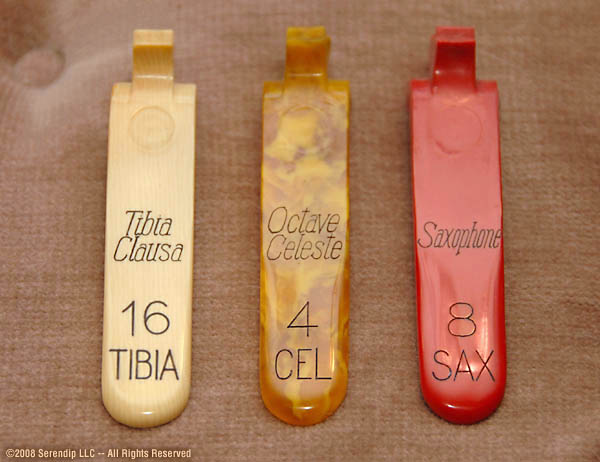
Among
the several important custom components, one of the most
useful is an implementation of traditional pipe organ
"pistons." These are the compact round push buttons found
beneath each manual. Usually there are between 6 and 10 of
these, although very large instruments might have 20 or more
on some manuals. I checked around until I found an existing
product which can send MIDI program change commands simply.
There are three RFX MidiBuddy boxes, and one somewhat more
deluxe MidiWizard (used for the Great manual). These devices
are really intended for foot use by on-stage musicians, thus
the buttons are quite large, and take a bit of pressure to
toggle. A somewhat later brainstorm
was that there should be something equivalent to a real
organ's Coupler stops. These allow the sounds from one
manual to be played from another one, usually the Great
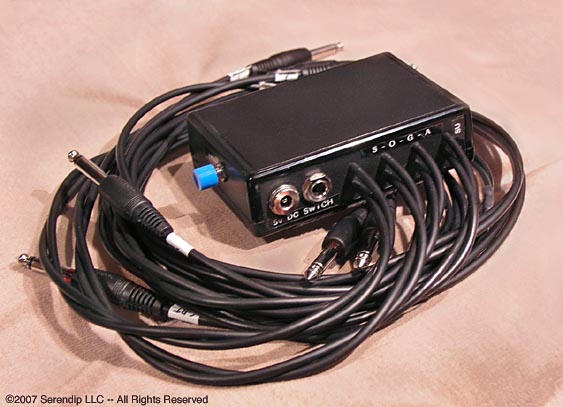
manual, adding more to what's already there. My couplers
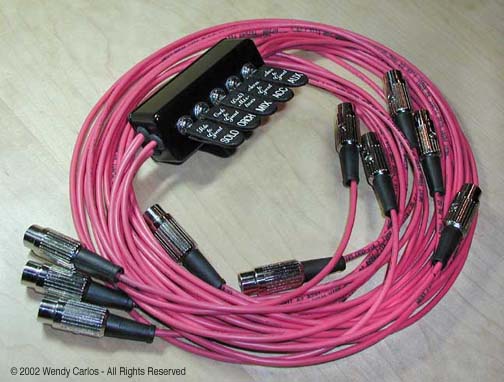
started as a trim, black vinyl clad, cast aluminum mini box,
and five premium DPDT bat handle mini switches, all of which
I ordered from Mouser. They also stock some durable metal
cover DIN connectors, the same as on the best MIDI cables. I
put this new device together in about eight hours, including
the measuring, drilling, soldering, final cabling, testing
and marking what goes where. The left photo shows the
finished box before installation. Looks good, huh? To the
right it's in place, along with three MIDI Transpose boxes
(I hid the Anatek original art with something that matches
everything else better). There's a homemade extension panel
mounted on the tiny Anatek buttons, much larger, and labeled
with three circles: "Flat
- Toggle - Sharp."
A press of Flat or Sharp jumps up and down by octaves, the
usual choice. Toggle returns to no transpose and back again.
You can also hold the center button and pick any other
interval (you play a note above or below mid-C for that) to
transpose by, allowing for some wonderful new coupling
intervals. |
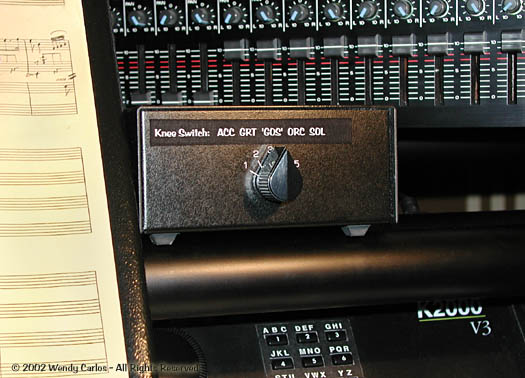
The
most recent addition has proven the versatility of a
completely custom instrument. You couldn't so easily add
this to a manufactured instrument. It consists of a simple
footswitch, rebuilt with much lighter spring, top surface
and tweakings to act as a knee-activated "pedal." That's it
at the upper center of the left photo above. My old Electone
E-5 has a similar knee-switch, used to change the
registration quickly on the upper manual. For the Wurly II
the new knee-switch is sent to the sustain and sostenuto
pedals of the synths. These are conveniently selected with a
small five position switch, shown above right. Here you
select the sustain pedal input to any of the four manuals,
or, in the fifth, center position (the usual choice), apply
a sostenuto pedal input to the upper three manuals (G, O and
S) simultaneously. It's surprisingly easy to use, and in no
way limits your right foot's ability to use the expression
pedals, simply rock your knee to the right lightly.
(BTW--
the left view also shows the MIDI shelves to advantage, and
the Thru and Merge and other mini boxes which allow this
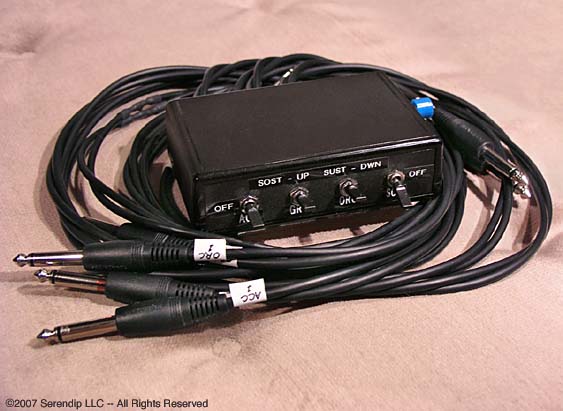
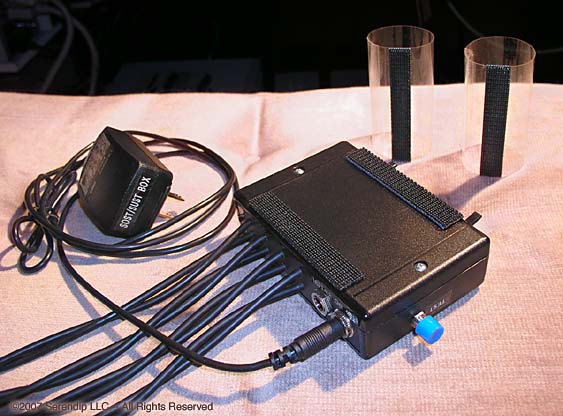
complex system to operate transparently.) Update
on the Sostenuto
Sustain Box: Turns
out that having a smart soustenuto ability on an "organ" is
quite a powerful extension. I've really become very fond of
it the last few years. Although the original circuit for
providing both sostenuto and sustain functions worked
reasonably well, it was actually a kludge. I had to isolate
the four Kurzweils from each other with resistors, since
they were all being controlled by a single-pole kneeswitch.
The synths don't like to have their control inputs strapped
together in parallel, so I used 560 ohm resistors on each
input, to "build them out" from the common SPST switch. At
times one synth might "wake" up a bit slower or faster than
the others at power-on, and it would falsely react to the
resistance circuit as if it were a normally closed switch,
not the actual normally open configuration used
(the
Kurzweils nicely sense the switches automatically on
powering up, but here it causes problems).
So it would behave backwards, turning the sostenuto function
ON when the knee switch was released, OFF when the switch
was pressed. Ick. I'd have to reset the synth manually when
this occurred. As I said, a kludge. Above you can see what
has now replaced it, front and rear views, some extras, and
the final new configuration in
place. Extras:
There have been a few additions to the Wurly II in the past
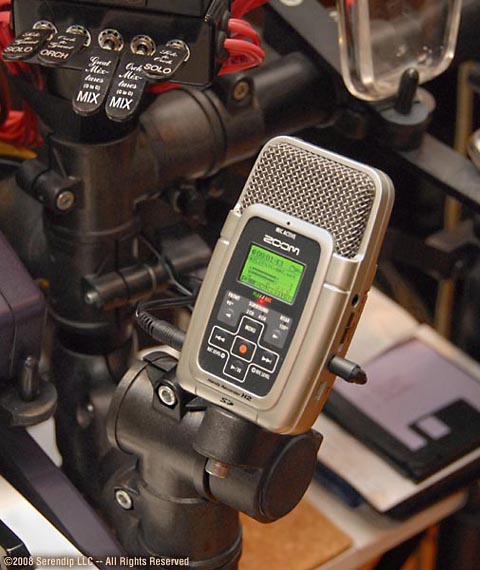
year which we ought include here. The most recent of these
is a small "handheld" digital recorder, the
Zoom
H2. For quite
awhile I'd been considering adding some kind of auxiliary
"scratch track" recorder to the rig, to allow handy single
take transcriptions to be made in high quality as I played
along (Note:
until recently my playing was pretty lame -- it's only this
year that I'm willing to save any of it, as finally this
here old dog [woof!] is picking up some skills of
what is for me, a new trick.) The
idea was to avoid requiring the rest of the studio equipment
to patched in, powered up and carefully adjusted, simply to
record in the usual way. A few magazine reviews convinced me
that one of the newest hand-holdables might do the job
modestly and with little fuss or mess. When my friend,
Manya, kindly brought by a new one she'd bought for work
(besides
being an amazing singer -- note
the music I wrote for
"Woundings"
-- she's an audio engineer at NPR).
"What's that?" "Here, take a look (she hands it to me)."
"Hey, that's amazing, I had no idea these existed."
"They do now. Try it out!" -- So I played with it awhile,
and got hooked, filing the idea away for a future purpose.
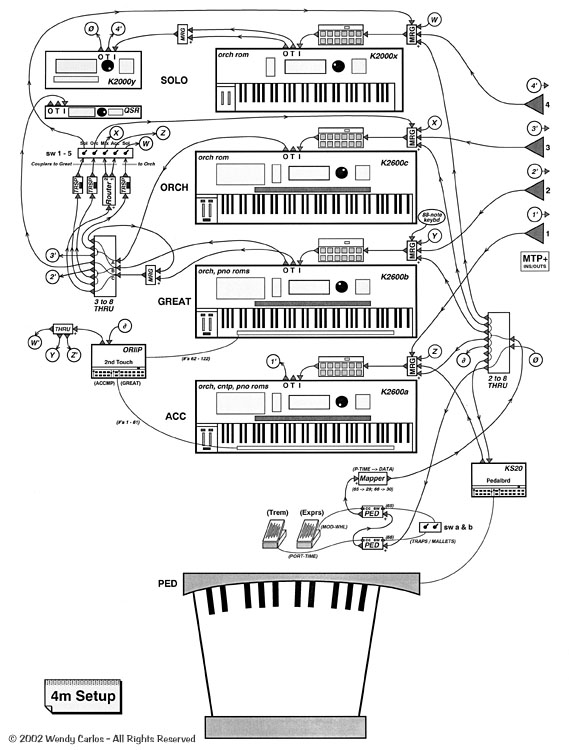
Like now. I've also added a few more
MIDI boxes to the interconnections, which I'll have to add
to the schematic diagram below. And I've been slowly
assembling a collection of several new toe-piston switches,
with all sorts of MIDI triggering devices, which will
probably be the next major addition. Again, these are modest
expansions. For example two added MIDI Solutions boxes now
provide mixture stops to the Orch manual as well as the
Great, and another provides a collection of convenient
switch functions, handy at times. Like the description of
this website as being a "Living
Page", it turns out
that the Wurly II is a "Living
Instrument" gradually
evolving and changing to adapt to new ideas that naturally
arise with more and more experience using and performing on
it.
Addendum:
after a good visit (Thursday,
July 5, 2007).
Just above you see a smiling Simon
Gledhill, trying
out the Wurly II for himself. Simon is a well-known,
well-travelled theatre organist from London, England
(besides
being a successful bank manager there).
He first contacted me about three years ago, right here, on
the website. I'd followed his career for years off and on,
and had a few of his albums, so recognized his name
right-off. A fine, modest musician. Turns out he's also a
bright, witty, amicable e-pen correspondent. He kindly sent
me some scans of several original George Wright score pages
he had obtained -- a serendipitous case of what's called: "a
blast from the past." I got quite a spooky kick to see
George's own pencil addendae and arrangement notes on these
familiar pieces, like "Quiet Village" (that's it on top of
the music rack), and "Roller Coaster." (I finally learned
what a few of Wright's original registrations were, more
than educated guesswork. Kewl.)
|
|
|
|
Wendy
Carlos, Wurly II - 3
![]()